
Here is an outline of how I make my soap labels. I have not gone into great detail about how to use the software I use to create my labels. There are so many software packages on the market and they all function differently, so I'm afraid you're on your own to figure out those details.
Creating the label text and artwork
I use Paintshop Pro to create the entire label including the text. You could use Paint, Gimp, Photoshop, or any other software that allows you to create a design that contains text and graphics.
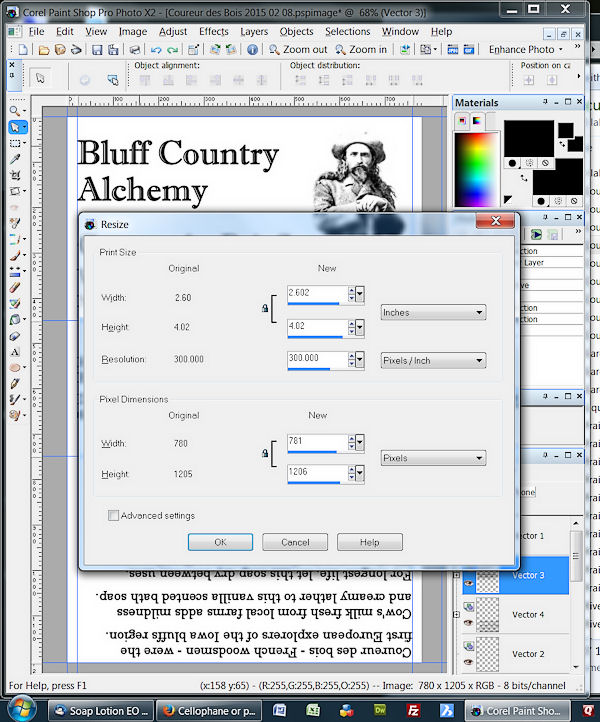
First off, I had to decide what size my label had to be. After some measuring and testing, I decided on a label 4 inches (102 mm) tall by 2.6 inches (66 mm) wide to best fit the sizes of soap I make. I then opened a new file in Paintshop using those dimensions as my print size.
I then needed to set up some structure to block off the different parts of the label. When this label is used with my soap, it forms a "U" shape. (See my packaging tutorial.) One upright side of the "U" is the front of the label, the other the back, and the bottom of the "U" is, well, the bottom.
I created imaginary guides in Paintshop that partition the label into those portions. Those are the horizontal blue lines in the photo below. I added vertical guides to create narrow margins of white space along each side -- I don't want the text or images too close to the edges. You can just eyeball this "white space" if you are uncomfortable creating guides.
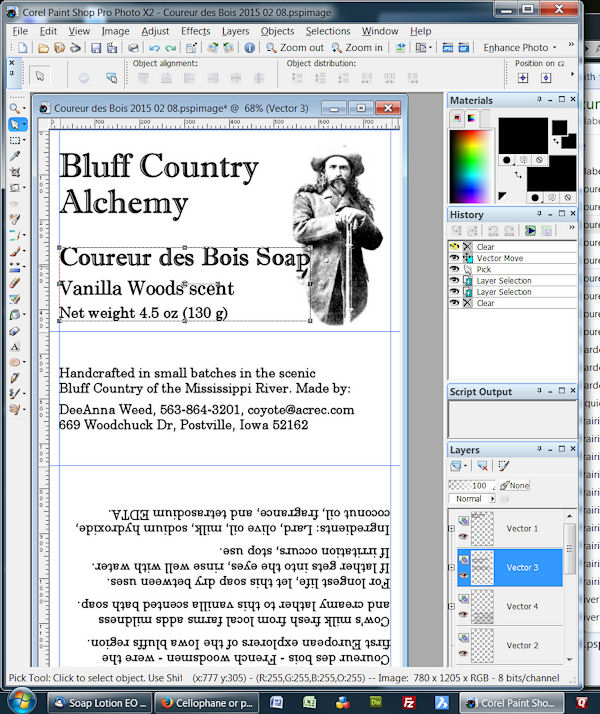
I used Google to find public domain images that fit the themes of my soaps. In the case of the Coureur des Bois ("woods runners") soap, the theme is the rough and tumble itinerant French explorers from the 1700s and 1800s who trapped, hunted, and fished in this region where I live (upper Mississippi River valley). The soap looks kind of like wood and it has a spicy woodsy scent.
I found a vintage photo of such a man (Pierre Le Royer, 1889), edited the photo to suit my needs by removing the background, rounding off the bottom of his coat, and increasing the contrast. I then inserted the tweaked photo into the label file.
The text is added likewise in Paintshop. I tweaked the location of each block of text so it fits around the artwork and is spaced nicely in each region of the label (front, back, bottom). The text on the label back has to be upside down to look right when the label is wrapped around a bar of soap. That is done by rotating the text object 180 degrees.
After getting the label set up, I saved the file as a JPEG image.
Printing the labels
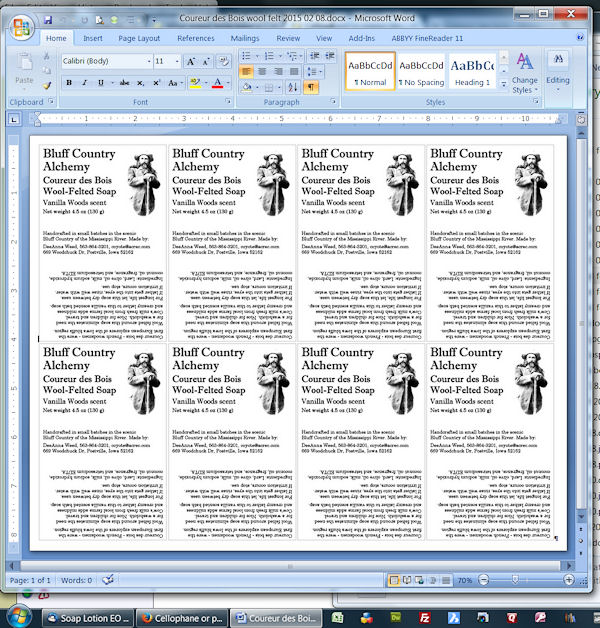
I opened a blank Microsoft Word document, set the page orientation to landscape, and set the margins to 0.17 inch (4.3 mm) all around -- these are the narrowest margins that my printer will accept. I then inserted as many of the JPEG images as would fit on one page.
I saved the document file, and printed enough labels to package a batch of soap. My log mold makes 14 full size bars plus end cuts, so two full sheets will make enough labels for an entire batch of soap.
I like to use HP Brochure Paper, matte white, 180 gram (HP #CH016A, available from office supply stores and Amazon.com) for the labels. This paper has about the weight and firmness of note cards or manila file folders, so it is sturdy and crisp, but is easy to cut and fold. I use a rotary cutter and straight edge to cut the labels apart. Scissors would work too, but are not as fast nor as accurate as a rotary cutter.
Why use Word AND Paintshop?
When I first started to design labels like this, I learned the hard way that I need to use each type of software to do things it does well, not things it does poorly. Hence, I use Paintshop to create the design and Word to get the design printed.
Word is incredibly annoying to use for graphic layout because Word does not want to leave the separate elements of a label in their proper places. You will spend more time cussing Word out than getting the job done. In Paintshop, I can set up the different elements of the label (four blocks of text and one image), tweak the position of each element in tiny increments, and everything will stay right where I put them.
Theoretically I could use Paintshop to print the labels, but Paintshop is not designed to allow a user to easily copy, paste, and print multiple objects on a page. That is Word's strength -- I can create a document in Word that contains multiple copies of the finished label and quickly print the document without a fuss.
Update on my label layout
Since I wrote my packaging tutorial, I decided to use a slightly different layout for my labels. The text on the back now includes the maker name and address as well as a description and ingredients list. This text flows as far as needed down the back and onto the bottom. The 3-region layout I originally used (see above) was nice in theory, but it didn't always work well in real life, since handcrafted soap varies a bit in size from bar to bar.
Here's the latest label I created for "Sweet Dreams", a soap that features the look and scent of the sweet grass (Hierochloe odorata) that I grow and harvest. You can also see I included a credit for the image of the sleeping girl with cat -- a courtesy I will add to my older labels as well.

Copyright © 2002-2023 - All rights reserved by Classic Bells Ltd.
Template by OS-templates.com