
In 2018, I participated in a soap making challenge (1) in which we were asked to use the sous vide (prounounced soo veed) method to make hot process soap. Sous vide is normally used to cook food, but it can be adapted to other uses as well.
The following describes how I made hot process (HP) soap with a sous vide method. The whole process took about 1 hour starting when I put the soap-batter-in-a-bag into the preheated water bath and ending when the finished soap was put into the mold.
I have also used this same method to melt the synthetic detergents for making syndet shampoo bars. (2)
Bags used for sous vide must be durable and heat resistant. I like to use 1-gallon (4 liter) heavy-duty plastic bags sold for vacuum sealing foods. Other people use heavy-duty "Ziploc" type food storage bags. Ziploc-type bags are more likely to leak than vacuum-sealer bags, but they can work if you are careful.
Preparing the soap batter. I used one of my favorite CP soap recipes that called for lye solution at my usual 33% lye concentration (2:1 water:lye ratio).
Many HP soap recipes use more water than CP recipes -- typically a 25% lye concentration (3:1 water:lye ratio) -- to allow for more water evaporation during the cook. But there is no water evaporation when using a sous vide method, so there is no reason to include extra water.
I used a well-behaved fragrance and added it right away rather than waiting until after the cook. Scent cannot evaporate if sealed in a bag.
The batter was mixed to emulsion in a separate bowl. Although it might seem more efficient to blend the batter right in the bag, please do not do this! I learned the hard way that it is not a good idea to use a stick blender in a plastic bag.
I set the bag into a tall, narrow bowl for good support and carefully poured the emulsified soap batter into the bag. A second pair of hands might also be helpful at this step to prevent spillage.
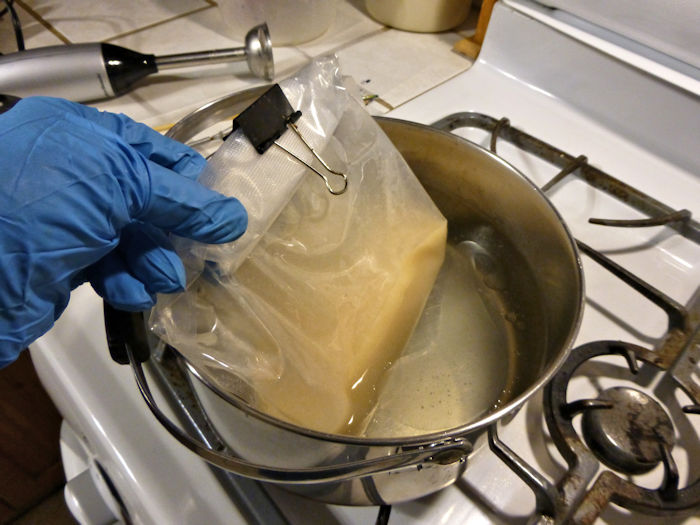
Starting the cook. I rolled the top of the bag several times and secured the roll with a metal binder clip. I set the bag into a pan of water heated to 180 F (80 C), making sure the soap batter was submerged for efficient heating.
I also made sure the rolled top stayed above the water level at all times. To keep the plastic away from direct heat, I pulled the water bath pot slightly to one side of the burner and made sure the top of the bag stayed on this cooler side of the pot.
The batter at this point was like thin gravy and was uniformly opaque (photo below).
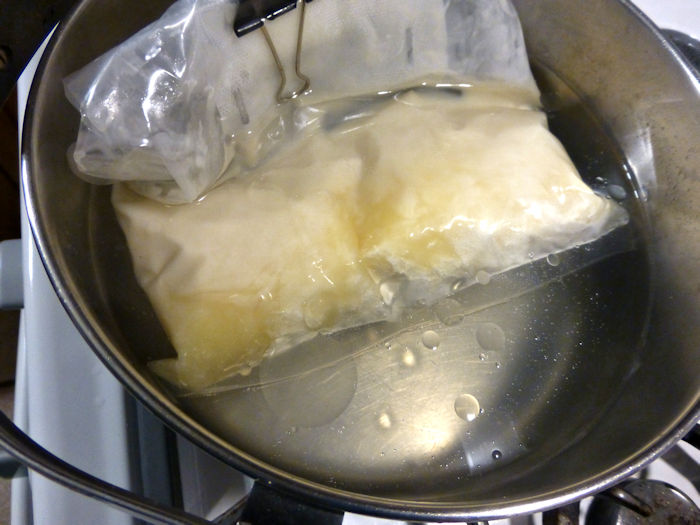
Gel stage. About 25 minutes later, the soap batter had become a thick non-pourable paste. The darker, more translucent spots in the photo below are where the soap has gotten warm enough to go into gel phase.
I took the bag out of the water bath a time or two and gently mixed the paste through the bag with my gloved hands. You could wear leather gloves to protect your hands from the heat, but my nitrile gloves worked fine for brief moments of mixing.
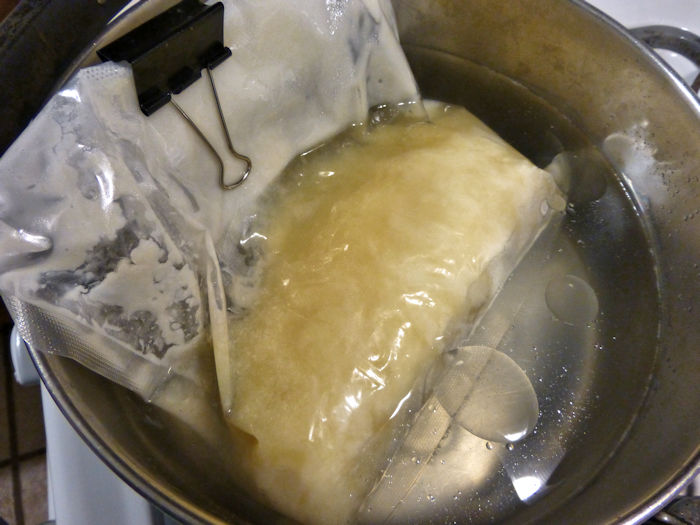
I cooked the soap for another 20 minutes until almost all of the soap had become translucent and softer, which indicates the soap has reached the semi-liquid gel phase (photo below).
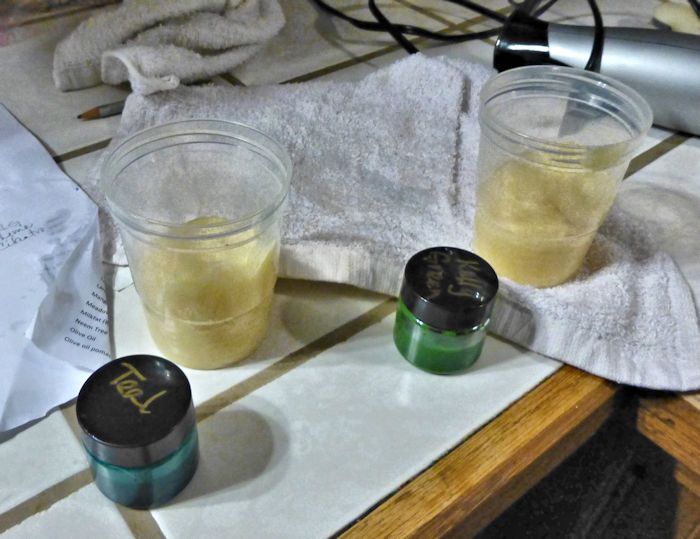
Coloring. I opened the bag and spooned out portions of soap into small cups for coloring (photo below). I closed the bag and put it back in the water bath to keep the uncolored soap paste warm.
I added pigmented color to the cups of hot soap and mixed with a chopstick. I then glopped the colors back into the main bag, held the top of the bag closed with one hand, and quickly mixed the soap by massaging through the bag with the other hand.
I tried to get the colors mixed enough without overmixing, but it was hard to tell at this point how the finished soap was going to look.
Molding. I cut off one lower corner of the bag and squirted the soap into the mold, going back and forth to distribute the colors a little more evenly throughout the loaf.
I ran a chopstick through the soap, with the idea that this might add a little more swirly-ness to the colors. I tidied the top as best as possible, but by that time, the surface had hardened enough that I could not do much tidying.
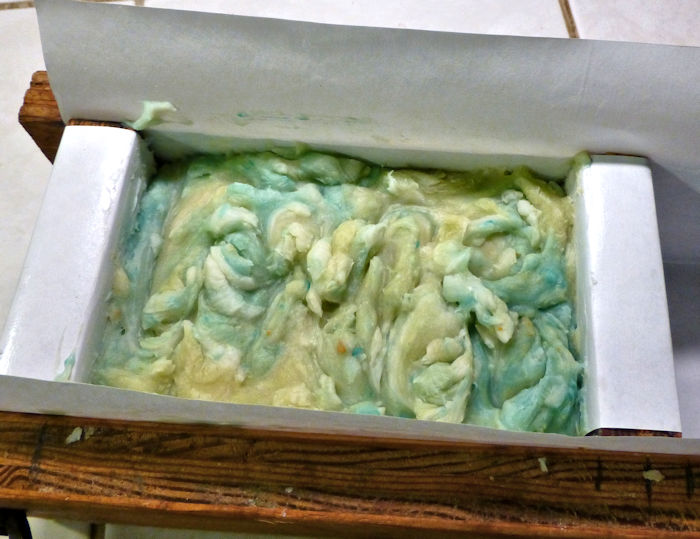
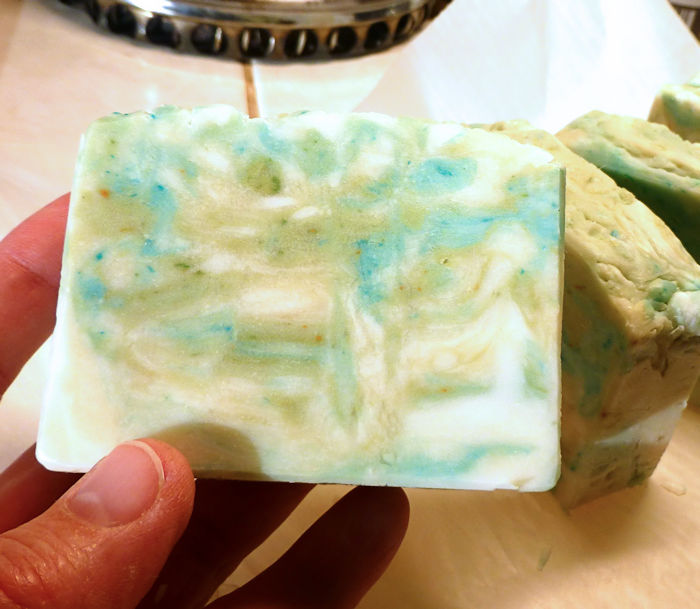
Unmolding and cutting. I let the soap cool overnight in the mold, and then cut it into bars the next morning. It was a little softer than my regular CP, but not nearly as soft as the HP soap I have made with the more typical 25% lye concentration. The soap had smoother texture that is similar to CP soap (photo below).
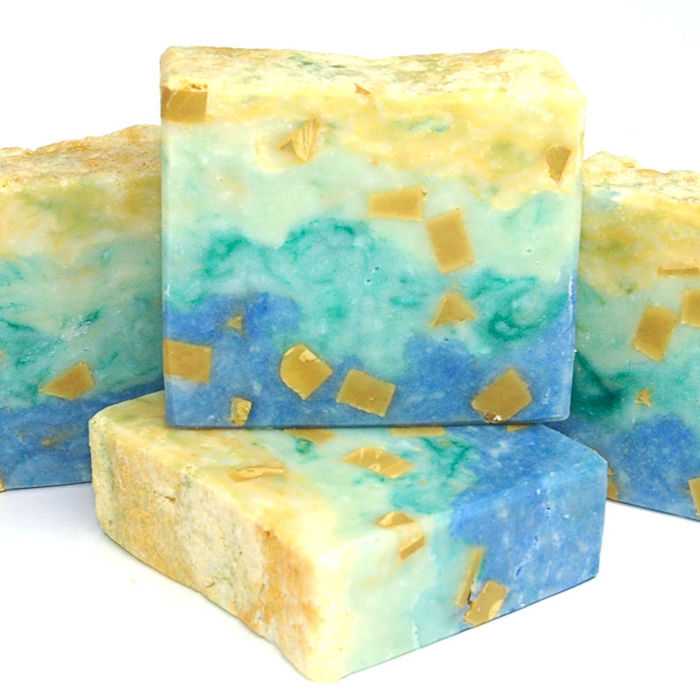
A second batch of HP soap I made with the sous vide method, again showing a smoother texture than is typical for HP soap --
References
(1) Salted Fig. "SMF April 2018 Challenge - Sous Vide (HP) Soap Swirling!" Soap Making Forum. May 2018. https://www.soapmakingforum.com/threads/smf-april-2018-challenge-sous-vide-hp-soap-swirling.69725/
(2) DeeAnna. Posts dated 25 February 2022 and 3 March 2022 in the thread "Melting SCI temp?" Soap Making Forum. https://www.soapmakingforum.com/threads/melting-sci-temp.86862/
Copyright © 2002-2025 - All rights reserved by Classic Bells Ltd.
Template by OS-templates.com